Showing posts with label structures. Show all posts

Tuesday, April 17, 2012

Inspirations: University of leipzig


I already made this pictures some time ago but didn't show them to you. This is the new building of the university of leipzig situated where the former Paulinerkirche (church of St. Pauli) stood. Therefor there was a reference to the old church integrated in the new design (the church was destroyed 1968, for more detailed informations just have a look at wiki :) ). 


It was a stormy and quite dark day. 


It is all blues and greys. Glas and stone. Surprisingly beautiful. 


But all the blues where stunning in the glas!


Irregular shapes... which are still ordered.


Oh just look at the broken lines! Even in twenty years, when it is used and dirty, from smog and birds and whatever... it will still look great! Because all the different shades, the broken lines... you won't see any dirt at all because the aging and weathering will be integrated in the whole image of the building. One may thing it looks so easy to accomplish but this is the hardest task at all! 


When the whole project "building a new main campus" started, to be honest, I didn't like the 3D pictures of the winning design. I was surprised how much I fell in love with it. The part which reminds in its shape of the former church... I could go without it. Nice but not too special. Maybe because the images are too well known? But the other parts, playing with glas and lights, with broken lines and colours... I could dream of whole cities build like this! :)

Sunday, August 14, 2011

Print with textures / structures...


I got mail from Michelle (Mich L in LA)! Real snail mail (did I ever say how much I love the english wordplay snail mail? :) ) There were two necklaces with jelly fishes inside: One for my little sister and one for me! I'll show you as soon as my sister comes for a visit :)

(this was already the second time Michelle send me jellies, because the first mail was lost :( It was so cool, generous and nice from Michelle to try the post another time and send me jellies again! Really, really thanks Michelle! :) )


In the envelope I found other goodies as well and of course I knew why they were there: Try and play! Oh, I just love to experiment with stuff!

So here is the first stuff I made with the "envelope-goodies"!

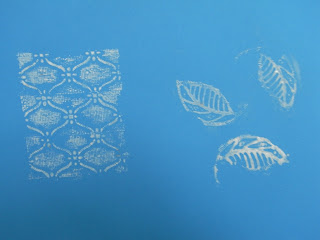
Michelle used some place mats to create jewelry out of them (have a look here and here) and gave me some pieces of them. Feeling the flowers in my hand while looking at them my first thought was: Could I use them as stamps?


So I cut them into smaller pieces, used some linolprint colour and... printed with them! I like the rough and non-perfect look they create!


But I have to say I was surprised that the print I loved the most was the one with the background structure which I expected to be the most boring one ^^ (the one on the picture below on the left side)


I'll make some cards the next days (but don't expect them too soon, I already got an answer for my thesis and have to work on some errors / changes / etc) :)

Monday, April 4, 2011

About cookie cutters and earrings...


I have several cookie cutters I just bought (some time ago... some.... long timer ago ^^) for crafting. You see I have a lot of them twice: One for crafting and one for food. Please, never use the ones for crafting for something you want to eat! Especially not if you are working with polymer clay like me! 

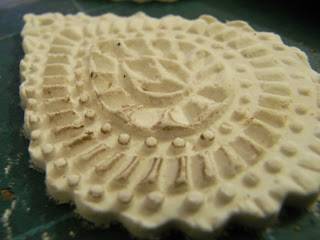
I wanted to try out wheter all the sizes were useable to make earring with them. For this kind of test I used air-drying clay (a very cheap one) because I didn't want to waste fimo (polymer clay) with it. But the principle is the same :)


I rolled out the clay and just stamped it... and then cut out parts with my cookie cutters...


They take time to dry. Not only a day...


This structure was made with my wooden stamp (you maybe know it from here). You see the brown spots? It's due to the wood of the stamp :)


I love this stamp!


This was made with a piece of fimo where I just pressed some plants in it. This is now my negative stamp for other clay. But it is not too easy to use. Sometimes the clay stuck on the baked fimo... If anybody has some ideas how to avoid this: Please! I also tried some laquer... didn't worked...


After drying I painted the surface with acrylic paints. I tried out different colours combinations and layers. 


Some colours were mat and some gloss...


And of course... metallic colours...! They are so beautiful in the sun!


This one I didn't use for earrings... mh... any ideas what to make out of it?


And here you can see the whole collection. All of them went to Lachafa for a real life earring study. After this she has to give me a report about which size is okay to wear and which colours worked best... etc :) After this I'll make more of them with fimo. Polymer clay is a little bit more stable than this air.drying clay. But... it is not too bad to be honest.


Buttons


This are most of the buttons I made here. Not all (not intentionally, I just forgot some ^^). I took some cardboard, stamped the obvious onto it (with my carved button stamps) and then fixed the buttons on the little cards by sewing.

On the back is my blog name :) I send them all to Lachafa. Either she can use them on her own or she can "order" the structures she likes in her favorite colours and give the buttons she don't need away (either to friends or completly strangers). ;)

Tuesday, March 29, 2011

Find all the structures!


I just love structures. Therefor I started a search for structures around me. I wanted structures / textures to go with fimo (polymer clay) especially with buttons. Of course I used stamps and my button-size cookie cutter.


Wooden stamps, silicon stamps, handcarved rubber stamps, fimo stamps... 

And a little fimo stone I made years... (over 12 years I think... or even more...) ago with a little rune. I found it per accident in a little old box where I store old fotos ^^ But I was even more surprised as I saw that I used a colour of Fimo they don't produce anymore. It was a little bit like jade with wonderful marbled greens... 


After that I used all the things below! And some more... which I forgot to put in the picture. 

Maybe you find them? :)


The circles....! A JordiLabanda pen ^^


I added acrylic colours... just to experiment a little bit with shadows, the fluidity of the paints, how to rub the colour of, how my dremel could affect the result... All this kind of things. 

I don't like every button but I learned from every single one!

The reason for my choosen clay colours was easy: Leftovers! :)

I also made with my little carved key stamps some fimo molds...


Some pendants, mostly buttons...